Floppy Recovery Case Study #1
Background
Today’s mission is to rescue a floppy found in an so far unknown floppy collection.
Software and hardware
Warpcopy + RR-net-cartridge or equivalent + quality Floppy Drive VC1571 used in this case + C-64 and a modern computer.
First things first, we need to load Warpcopy Server to the C-64 via the PC side. By enable Warp Mode the process will speed up.
Here is what makes Warpcopy so powerful when we want to read a Floppy Disk, it can retry Read Sectors with errors to ensure to not leave out any important Data.
Most of the time it’s an easy task to transfer Floppies, however there are situations when things don’t work and we get an obstacle.
The Goal
Rescue a Floppy Disk looking this way
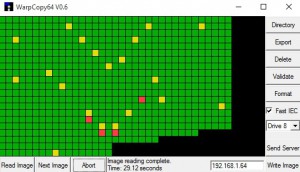
The Floppy we’re trying to rescue looks like this, when we have done all there is to preserve it, you get all teared up, your eyes starts to get teary.
In this case the Floppy Drive Head was clean and it’s time to explore the actual Floppy to get an idea what’s going on.
When exploring the floppy we want a correct angle to get an ocular view of the magnetic surface of the Floppy. What we want to develope is the opposite side of the Floppy that is inserted into the actual Floppy Drive. The Floppy is being read from the bottom, where the Read Head is allocated
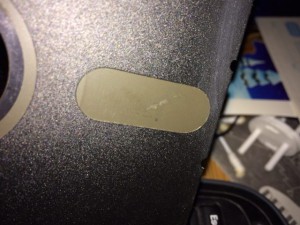
We can easily identify dirt such as, food stain, Coca-Cola, pizza, hot choco or body liquid from an excited teenager. This is what we call, “Classic Floppy Dirt”.
Whatever it is, it’s not supposed to be there and it needs to be dealt with! Moist one side of the tops with water and carefully wet the disgusting coating to carefully mop and rub up the dirt with the dry side of the tops. Repeat the process with new tops and make sure you work on a flat soft surface and don’t by any means bend the floppy. This is because you don’t wish to accidentally damaged the opposite side of the floppy.
You can carefully rotate the Floppy to discover more horrible stains. When rotating do only rotate the actual Floppy and lock the Magnetic Disc. After we have cleaned the Floppy it’s time to Read the Floppy again with WarpCopy.
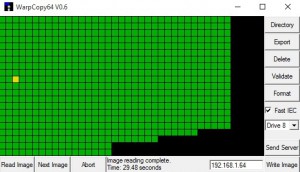
Wow, this is great what a difference! There is a possibility many files are rescued and can be read from the Floppy. However, even ONE dirty dot can cause errors on ONE particularly file that is “the one”, the one we want to save because it contains “the missing file”, that has never been seen before! Look at that yellow square, that needs to go away. Even after two readings it’s still there, that stubborn gunk!
Now we have reached a critical point in this lesson.
DO NOT GIVE UP!
You saw how the minor cleanup we did above could do magic. So what are we waiting for.
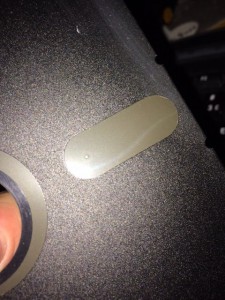
When we give the Floppy an ocular inspection we see one ugly white dot glaring at us! Let’s do this one more time to try save that piece of Data. Even if the dot wants us to stop, we want more and we are hungry to show who’s the “preserver”.
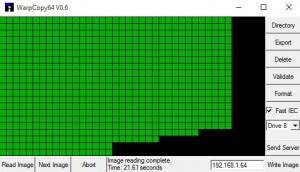
The archaeologist audience is going crazy, cameras are taking photos, flashes go off and we get confetti all over the place!
We have saved Floppy Side A!
The mission is completed and the archaeologist’s work and pride will be written as memory in all the old computer men’s books and this .D64 image will be released to the Future Generation.
Now we can throw this floppy in the closed case files, if we want.
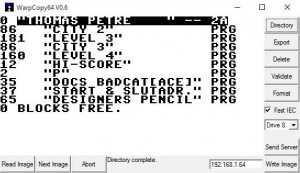
The content is looking at us and says “thank you”.
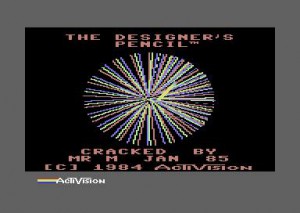
Now look what this process lead to! A crack that wasn’t archived, yet.
Designer’s Pencil from Mr.M in 1985.
This was an awesome example how to preserve a Floppy and do it the right way!
End of today’s lesson <case submitted by Hedning/GP – Translated by Xiny6581>